Guide
Knotless braids: how to do them, sizes and how long they last
How the feed-in start works, how it differs from a box braid, the sizes and hair counts, and how long to keep them in.
Published
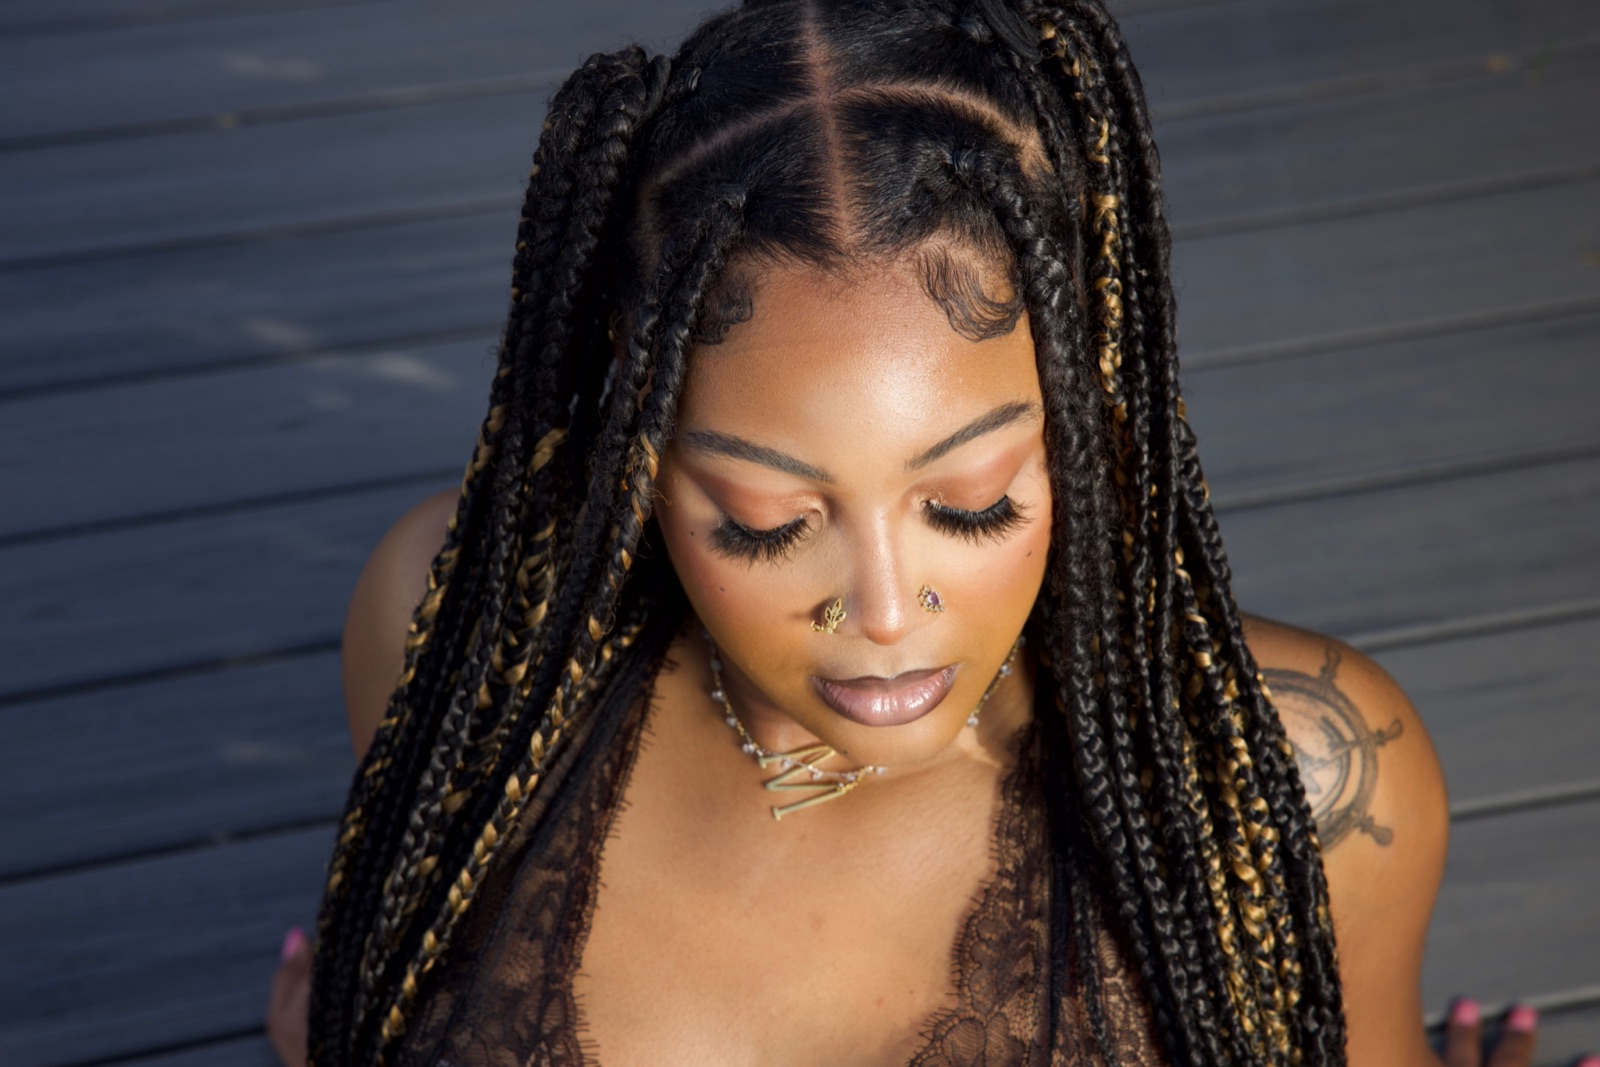
Knotless braids look like box braids, but each one starts with your own hair and the braiding hair is fed in a little at a time, so there is no knot of extension hair at the root. The result lies flatter and, done gently, pulls less at the scalp. This guide covers how to do knotless braids step by step, how they compare with box braids, the sizes from small to jumbo, how much hair to buy and how long to keep them in.
What you'll need
Essentials
-
Pre-stretched braiding hair
: fed into each braid in small pieces; pre-stretched hair has tapered ends, which helps the feed-in blend. -
Rat-tail comb
: clean parts sized to the braid you want. -
Braiding gel
: holds the short natural-hair start of each braid smooth and neat. -
Sectioning clips and hair ties
: keep the rest of the head out of the way. -
Leave-in conditioner
: slip for detangling and moisture before you braid.
Optional
-
Mousse
: smooths frizz over the finished braids. -
Light scalp oil
: for dry or itchy scalp while you wear them. -
Three-way or handheld mirror
: helps you see the back when braiding your own hair.
How knotless braids differ from box braids
The start of the braid
In a classic box braid, braiding hair is looped around the base of your section and forms a knot at the root. A knotless braid begins with only your own hair, braided for a few stitches, and the extension is added gradually as you work down. L'Oréal Paris's tutorial says it is that base without a knot that makes the braid "knotless."
Tension and comfort
Afro hairstylist Gemma Moodie explains to Stylist that adding small amounts of hair as you go, instead of starting with a bulky chunk, creates less tension and pulling on the roots, so there is less risk of traction alopecia and follicle damage. Tricoci University's braiding program also calls them gentler on the hair and scalp. StyleSeat adds that knotless braids lie flatter and are more flexible right after the appointment.
That benefit has limits. A cosmetology study guide points out that knotless construction reduces the lump and tug at the follicle only if tension and added weight stay moderate: over-tight feed-in still injures the follicle.
Time and cost
Because each braid is built in stages, knotless braids take longer to install than box braids of the same size, and StyleSeat notes fewer braiders are skilled at them, which is why they often cost more.
Prepare your hair
L'Oréal's tutorial starts with freshly washed and conditioned hair, no more than a day before braiding, dried completely. Then:
- Apply leave-in conditioner for slip and detangle with a wide-tooth comb from the ends up to the roots.
- Divide the hair into four even sections, or more for very long or thick hair, and secure the ones you are not working on.
- Add a cream or more leave-in, including on the ends.
Stylist's guide adds that blow-dried, straighter hair blends more easily with the extensions, and that braiders generally need a bit more length to work with for this technique.
How to do knotless braids, step by step
- Part the section. Use the rat-tail comb to make a square, triangle or other part sized to the braid you want. L'Oréal warns that oversized parts add tension to the scalp, so match the part to the braid.
- Gel the root. Smooth a little gel over the section.
- Start with your own hair. Split the section into three strands and braid with only your hair for a few stitches, until it feels secure. Keep it firm but not tight.
- Feed in the first piece. Lay a thin piece of braiding hair against one strand and braid it in. Keep the feed-in pieces about the same length as your natural hair so they blend.
- Keep feeding. Add thin pieces every few stitches until the braid reaches its full thickness, then braid to the end without adding more.
- Set the braid. L'Oréal mists each finished braid with holding spray, root to ends, to help it hold and stop unraveling.
- Repeat. Do the back first, the hardest part to reach, and pin the front up in a bun if you need a break.
- Finish. Work an egg-sized amount of mousse from root to ends. L'Oréal suggests skipping the hot-water dip salons use unless you know the technique; see the sealing steps in our box braids guide if you do.

Knotless braid sizes
Knotless braids come in the same sizes and lengths as box braids. The names braiders use:
Small knotless braids
Many thin braids from small parts. They take the longest and need the most hair.
Smedium and medium knotless braids
Smedium is shorthand for a size between small and medium, as in the "smedium" set described in Refinery29's review. Medium, from parts around an inch, sits in the middle and is a manageable first install.
Large and jumbo knotless braids
Fewer, thicker braids from bigger parts; quicker to install. Larger braids spread the pull over more hair, and the American Academy of Dermatology advises choosing thicker braids and keeping them shorter to reduce strain.
Hair needed by size
Curl Centric's estimates for mid-back length and average density:
| Size | Single bundles (about 85 g each) |
|---|---|
| Small | 9 to 10 |
| Medium | About 8 |
| Large | About 7 |
| Jumbo | Nearly 6 |
Curl Centric plans on about 15% more hair than box braids of the same size. Buy one or two extra packs from the same batch. More on fibers and colors in our braiding hair guide.
Knotless box braids and other variations
"Knotless box braids" is simply another name for knotless braids with square parts. Add loose curly hair along the braids and you have boho braids; leave curls at the ends and you are close to goddess braids.
Common mistakes
- Starting the braid too tight. The flat, natural-looking base is the point of the style; a hard pull at the start removes the benefit.
- Feeding in thick pieces. Big pieces leave a visible step in the braid and add weight at once. Thin pieces, more often, blend better.
- Pulling in the edges. The front hairline, temples and nape are where traction hair loss usually starts. Keep perimeter braids larger and looser, and do not braid baby hair into them.
- Ignoring pain. The American Academy of Dermatology says a style that feels painful is too tight.
Caring for knotless braids
Weekly care
L'Oréal suggests a lightweight oil on the scalp and hair once a week and covering the braids with a silk scarf or bonnet at night. Wash gently, focusing on the scalp, and let the braids dry completely.
How long to keep them in
As your hair grows, the start of each braid moves away from the scalp; StyleSeat notes new growth adds weight to knotless braids, and Eunice Asiedu tells Stylist the braids around the perimeter start to feel heavier as the hair grows out; she suggests keeping them in for only two to three weeks. StyleSeat recommends taking them out after four to six weeks, and L'Oréal suggests around the six-week mark to prevent matting at the roots. The American Academy of Dermatology's limit for any braids is six to eight weeks.
When to see a dermatologist
Broken hairs at the hairline, scalp pain, stinging or crusting are signs to take the braids out. The American Academy of Dermatology notes traction alopecia can become permanent the longer it goes untreated, so see a board-certified dermatologist as soon as you notice it.
Questions
What is the difference between knotless and box braids?
A box braid starts with braiding hair looped around your own hair at the root, which forms a small knot. A knotless braid starts with your own hair only and adds braiding hair gradually as you braid down, so there is no knot and the base lies flatter.
Are knotless braids better for your hair?
They can put less tension on the roots because no bulky extension is attached at the scalp. They can still cause damage if the braids are tight, the parts are tiny or the hair is heavy; pain always means the style is too tight.
How long do knotless braids last?
Plan on about four to six weeks. As your hair grows, the start of each braid moves away from the scalp and the braids feel heavier, and the American Academy of Dermatology advises wearing braids no longer than six to eight weeks.
What are smedium knotless braids?
Smedium is braider shorthand for a size between small and medium. It gives a full look with fewer braids than small, so it takes less time to install.
How many packs of hair do I need for knotless braids?
For mid-back length, Curl Centric estimates about 6 bundles for jumbo, 7 for large, 8 for medium and 9 to 10 for small knotless braids, about 15% more than box braids of the same size.
Why do knotless braids take longer to install?
Each braid starts with your own hair and the extension is added in several small pieces instead of one piece at the root. That extra handling adds time, and StyleSeat notes that fewer braiders are skilled in the technique.
Sources
- L'Oréal Paris — Knotless braids: a beginner's tutorial
- Stylist — Are knotless braids the low-tension answer to box braids?
- StyleSeat — Knotless vs. box braids
- Tricoci University — The art and business of African hair braiding
- Curl Centric — How many packs of braiding hair do I need?
- Refinery29 — Knotless goddess braids
- Open Exam Prep — Natural hair braiding (OK cosmetology study guide)
- American Academy of Dermatology — Hairstyles that pull can cause hair loss
Read next
Box braids: how to do them, sizes from small to jumbo, and care
Prep, parting, adding the hair and sealing the ends, plus how braid size changes the hair count, the install time and the pull on your scalp.
Boho braids: how to do boho knotless braids and keep the curls fresh
What makes a braid boho, which curly hair to use, how the curls are added as you braid, and the extra care the loose strands need.
Passion twists: the hair, the install and how to make them last
Water wave hair, a plain two-strand twist and a light hand at the root: how passion twists are made, by hand or with a crochet hook.